Connect Your Repository
Goal: Connect your GitHub or GitLab repository to Recce Cloud for automated PR data review.
Cloud supports GitHub and GitLab. Using a different provider? Contact us at [email protected].
Prerequisites
- Cloud account (free trial at cloud.reccehq.com)
- Repository admin access (required to authorize app installation)
- dbt project in the repository
How It Works
When you connect a Git provider, Cloud maps your setup:
| Git Provider | Cloud |
|---|---|
| Organization | Organization |
| Repository | Project |
Every Cloud account starts with one organization and one project. When you connect your Git provider, you select which organization and repository to link.
Monorepo support: If you have multiple dbt projects in one repository, you can create multiple Cloud projects that connect to the same repo.
Connect GitHub
1. Authorize the Recce GitHub App
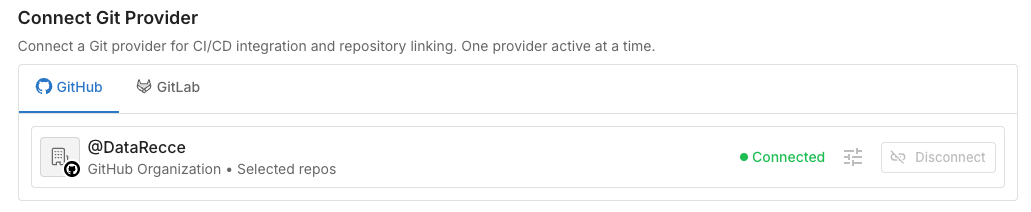
Navigate to Settings → Git Provider in Cloud. Click Connect GitHub.
Expected result: GitHub authorization page opens.
2. Select Organization and Repository
Choose which GitHub organization to connect. This becomes your Cloud organization.
Then select the repository containing your dbt project. This becomes your Cloud project.
Expected result: Repository connected. Your Cloud project is ready to use.
Connect GitLab
GitLab uses Personal Access Tokens (PAT) instead of OAuth. Unlike GitHub, where the Recce GitHub App posts comments as itself, GitLab API comments appear as the token owner. We recommend creating a dedicated service account so that PR comments appear as a bot rather than your personal account.
Use a shared team email
When creating the service account, use a shared team email (e.g., [email protected]) so it isn't tied to any individual.
1. Create a Dedicated Service Account (Recommended)
If you use your personal token, your teammates see PR comments from you rather than from Recce Cloud. To avoid this, create a GitLab service account for Recce Cloud:
- In GitLab, navigate to your group → Settings → Service Accounts
- Click Add service account
- Set the name to Recce Cloud (username auto-generates)
- Click Create service account
- (Optional) Edit the account to customize the username and upload a Recce avatar
Expected result: Service account appears in the group's member list with a "service account" badge.
Add the service account as a Developer member to the projects you want Recce Cloud to access.
Availability
GitLab service accounts are available on GitLab.com Free (up to 100 per group), Premium, and Ultimate. For Self-Managed Free instances where service accounts are unavailable, create a dedicated GitLab user (e.g., recce-cloud-bot) instead.
If you don't have group admin access, you can skip this step and use a personal access token directly. Note that PR comments will appear as your user account.
2. Create a Personal Access Token
Generate a PAT for the service account (or your personal account if you skipped Step 1):
- For a service account: navigate to your group → Settings → Service Accounts, select the account, and click Create token
- For a personal token: navigate to User Settings → Access Tokens → Add new token
- Set a descriptive name (e.g., "Recce Cloud integration")
- Select the
apiscope (required for posting PR comments). Theread_apiscope is not sufficient. - Set an expiration date and click Create
- Copy the token immediately (it cannot be viewed again)
3. Add Token to Cloud
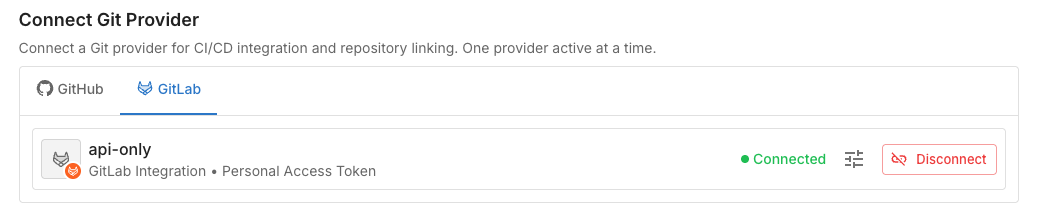
Navigate to Settings → Git Provider in Recce Cloud. Select GitLab and paste the token.
Verify Success
In Cloud, navigate to your repository. You should see:
- Connection status: "Connected"
- Organization Project is linked to a git repository

Troubleshooting
| Issue | Solution |
|---|---|
| Repository not found | Ensure proper permissions are granted (GitLab: token access, GitHub: app authorized) |
| Invalid token (GitLab) | Generate new token with api scope |
| Cannot post PR comments (GitLab) | Regenerate token with api scope instead of read_api |
| PR comments show as personal user (GitLab) | Create a service account and use its token instead of your personal token |