Data Developer Workflow
Validate data changes throughout your development lifecycle. This guide covers validating changes before creating a PR (dev sessions) and iterating on feedback after your PR is open.
Goal: Validate data changes at every stage of development, from local work through PR merge.
Prerequisites
- Recce Cloud account
- dbt project with CI/CD configured for Recce
- Access to your data warehouse
Development Stages
Before PR: Dev Sessions
Validate changes locally before pushing to remote. Dev sessions let you run Recce validation without creating a PR. Since your CD workflow automatically maintains the base environment, you just upload your local target/ artifacts as the current environment to compare against production.
When to Use Dev Sessions
- Testing changes before committing
- Validating complex refactoring locally
- Exploring impact without creating a PR
- Sharing work-in-progress with teammates
Upload via Web UI
- Go to Cloud
- Navigate to your project
- Click New Dev Session
- Upload your dbt artifacts:
target/manifest.jsontarget/catalog.json
Expected result: Dev session created. Recce validates your changes against the production base.

Upload via CLI
Run from your dbt project directory:
This uploads your current target/ artifacts and creates a dev session.
Required files:
| File | Location | Generated by |
|---|---|---|
manifest.json |
target/ |
dbt run, dbt build, or dbt compile |
catalog.json |
target/ |
dbt docs generate |
Review Your Changes
After uploading, you can review your changes in Cloud:
- Trigger agent review - Click Data Review to generate a summary of your changes
- Read the summary - The agent analyzes impact, runs validation checks, and explains what changed
- Launch Recce instance - Click Launch Recce to explore lineage, run data diffs, and investigate deeper
After PR: CI/CD Validation
Once you push changes and open a PR, the Recce Agent validates automatically.
What Happens
- Your CI pipeline runs
recce-cloud upload - The agent compares your PR branch against the base branch
- The agent runs validation checks based on detected changes
- A data review summary posts to your PR
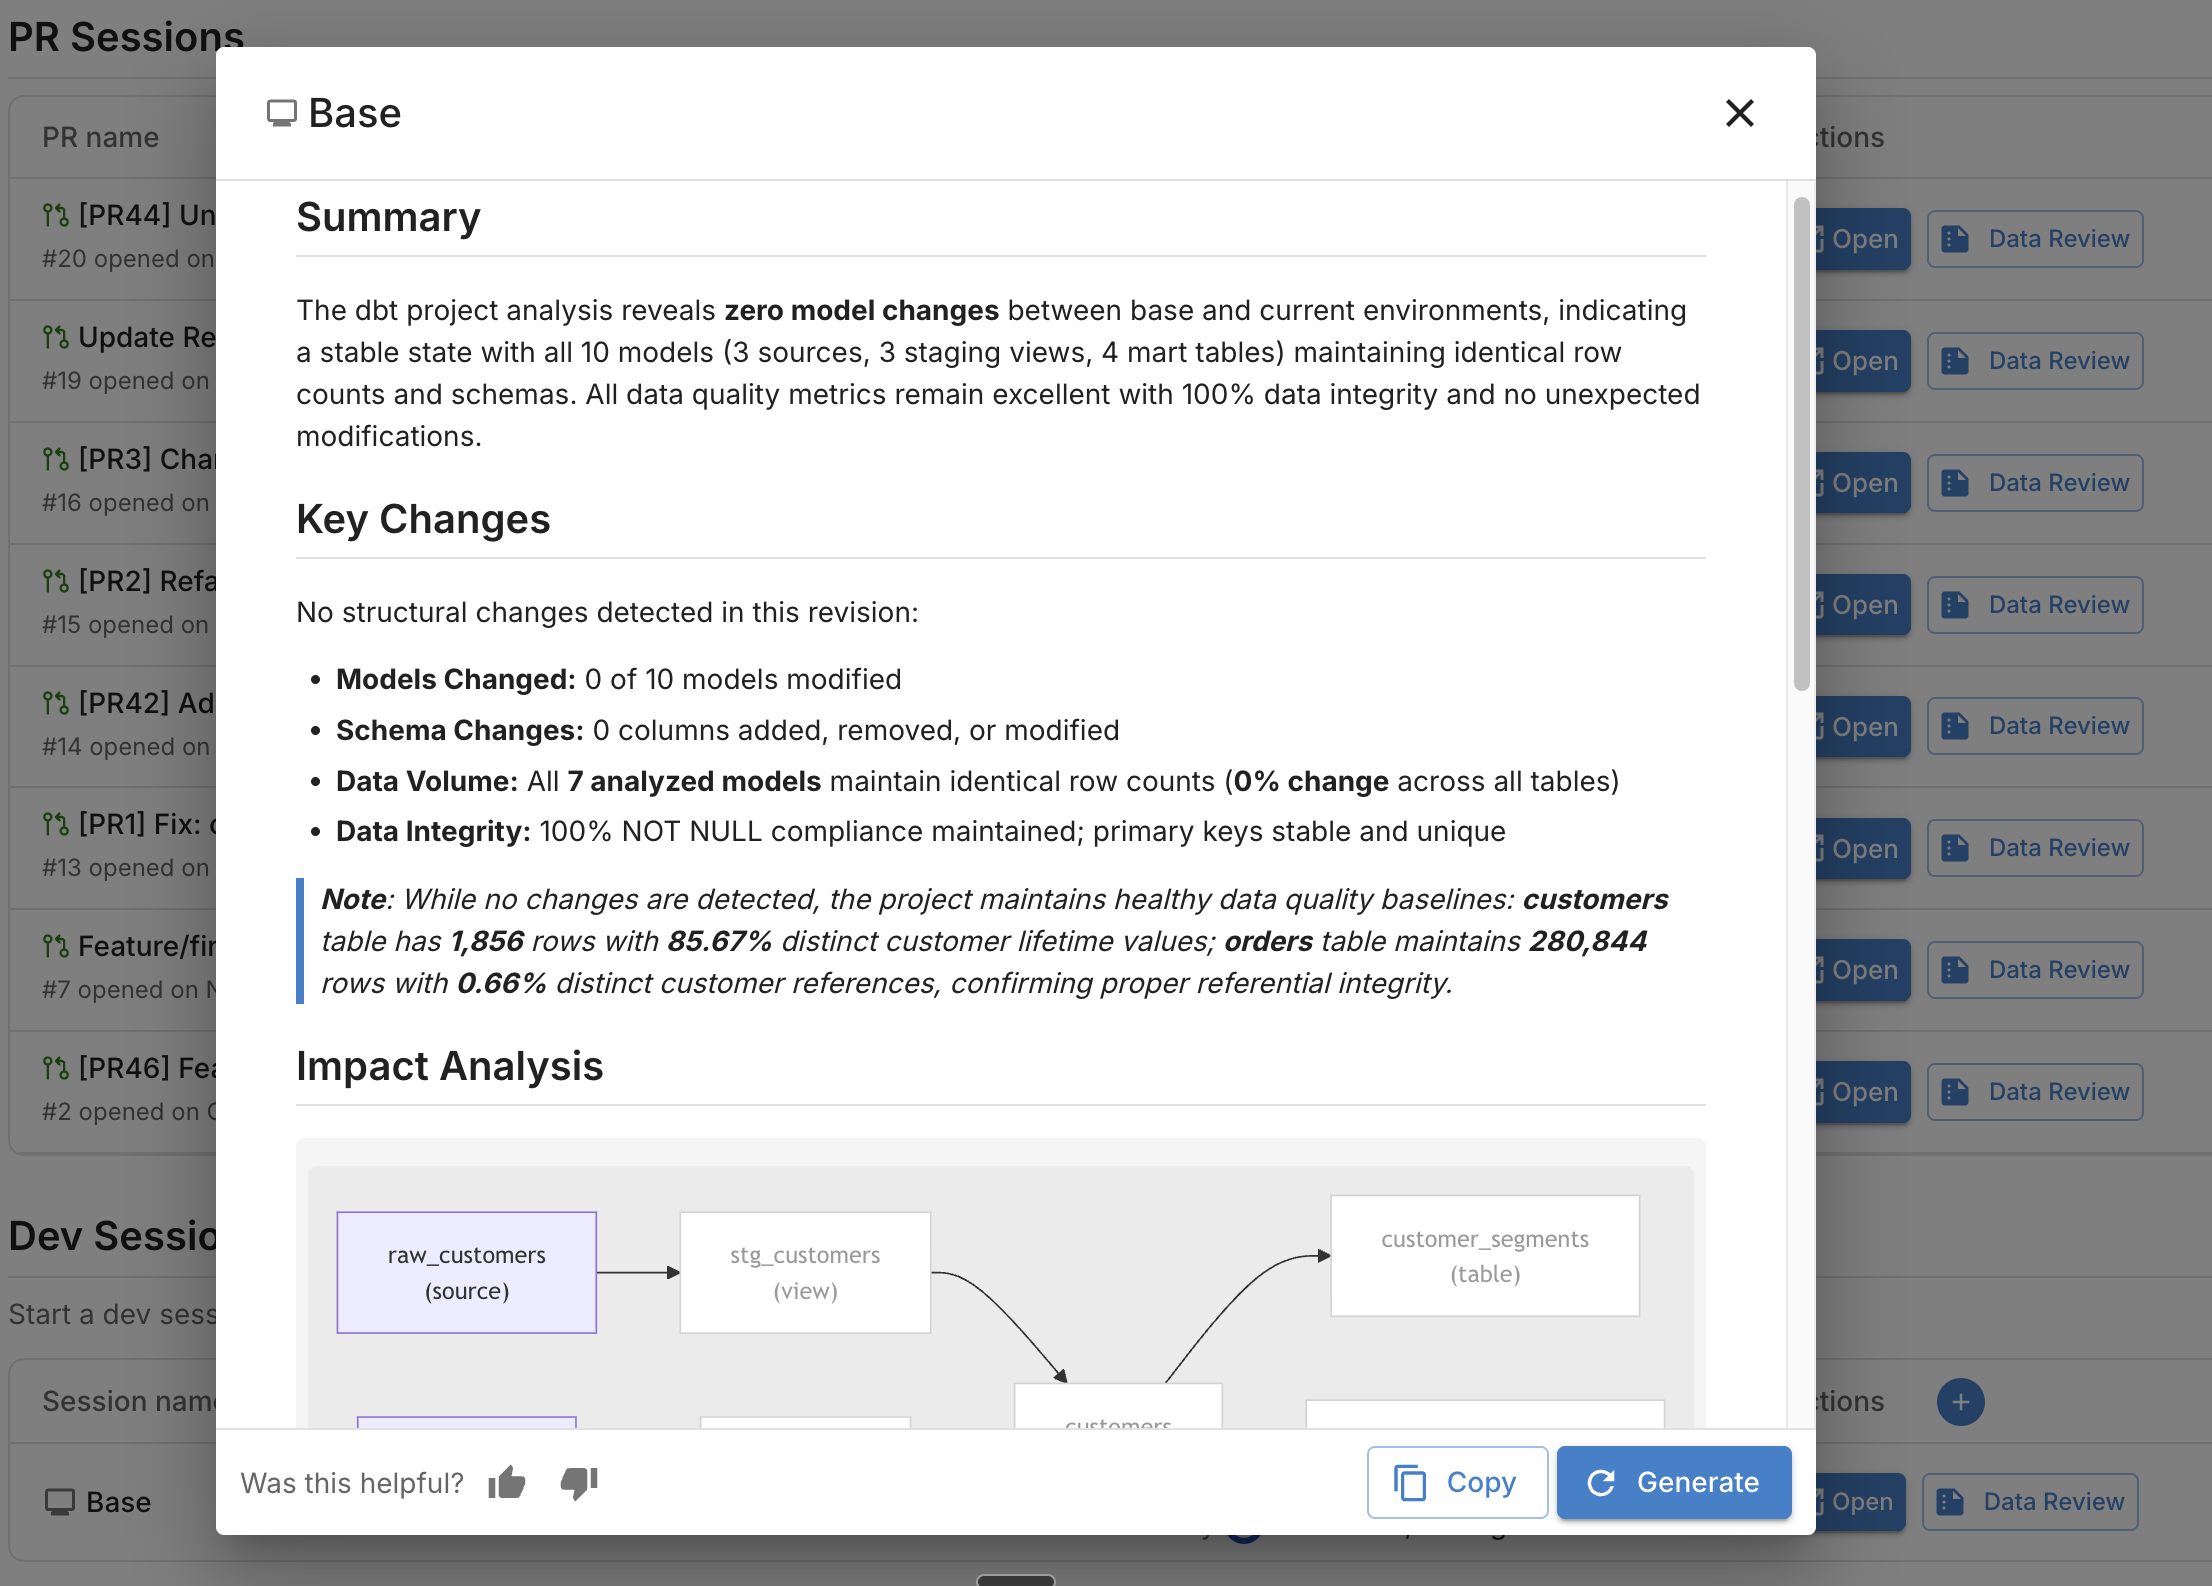
Understanding the Agent Summary
The summary shows key changes, impact analysis, checklist results, and suggested actions. See Reading the Summary for details.
Fixing Issues
When the agent identifies issues:
- Review the validation results in the PR comment
- Click Launch Recce to explore details in the web UI
- Identify the root cause using lineage and data diffs
- Make fixes in your branch
- Push changes - the agent re-validates automatically
Iterating Until Checks Pass
Each push triggers a new validation cycle:
- Agent re-analyzes your changes
- New validation results post to the PR
- Previous results are updated (not duplicated)
- Continue until all checks pass
Validation Techniques
Check Lineage First
Start with lineage diff to understand your change scope:
- Modified models highlighted in the DAG
- Downstream impact visible at a glance
- Schema changes shown per model
Validate Metadata
Low-cost checks using model metadata. See Data Diffing for details:
- Schema diff - Column additions, removals, type changes
- Row count diff - Record count comparison (uses warehouse metadata)
Validate Data
Higher-cost checks that query your warehouse:
- Value diff - Column-level match percentage
- Profile diff - Statistical comparison (count, distinct, min, max, avg)
- Histogram diff - Distribution changes for numeric columns
- Top-K diff - Distribution changes for categorical columns
Custom Queries
For flexible validation, use query diff:
SELECT
    date_trunc('month', order_date) AS month,
    SUM(amount) AS revenue
FROM {{ ref('orders') }}
GROUP BY month
ORDER BY month DESC
Add queries to your checklist for repeated use.
Add to Checklist
After running validation checks, add them to your checklist for reviewers:
- Run a validation (row count, profile, value diff, etc.)
- Click Add to Checklist to save the result
- Add a description explaining what the check validates and what reviewers should look for
Write clear descriptions that help reviewers understand:
- What changed - The specific model or column being validated
- Why it matters - Business context or downstream impact
- What to verify - Expected behavior or acceptable thresholds
Good descriptions reduce back-and-forth and speed up PR approval. See Checklist for more details.
Verification
Confirm your workflow works:
Before PR:
- Make a small model change locally
- Generate artifacts:
dbt build && dbt docs generate - Upload dev session:
recce-cloud upload --type dev - Verify session appears in Cloud
- Launch Recce to explore changes, or click Data Review to trigger agent validation
- Iterate on your changes until validation passes
After PR:
- Create PR and confirm agent posts summary
- Launch Recce and add validation checks to checklist
- Push a fix and confirm agent re-validates
- Confirm reviewers can approve checks
Troubleshooting
| Issue | Solution |
|---|---|
| Dev session upload fails | Check artifacts exist in target/; run dbt docs generate |
| Agent doesn't run on PR | Verify CI workflow includes recce-cloud upload |
| Validation results missing | Check warehouse credentials in CI secrets |
| Summary not appearing | Confirm GITHUB_TOKEN has PR write permissions |
Next Steps
- Data Reviewer Workflow - How reviewers use Recce
- Admin Setup - Set up your organization
- Data Review Summary - Understanding agent summaries